Podcast
NTE Podcast: Healthy Home Hacks v2.0

Jul
NTE Podcast: Healthy Home Hacks v2.0
Its been about 6 months since I promised we’d do another episode about healthy home hacks…so here we go! IAQ, staining, wood knots, PVC pipes…lots of quick and easy ideas you can implement right away. For our American listeners, have a happy and healthy Independence Day!!
iTunes
Google Play
Spotify
Transcript
Healthy Home Hacks v2.0
Andrew Pace: Welcome to the Non Toxic Environments podcast. My name is Andrew Pace every week. My cohost Jay Watts and I will discuss healthier home improvement, ideas and options. Thank you for finding us and please enjoy the show.
Welcome back to Non Toxic Environments, everyone. This is Andy Pace, Jay, we got a fun episode this week lined up.
Jay Watts: Yeah, we do. About a year over a year ago, we did a show called The Hacks and that’s where we had some interesting and novel approaches to dealing with certain challenges in a construction project. And I thought we promised our listeners that we would do another hack show and it’s hack Thursday right before the 4th of July weekend. So tell me about your hack, Andy. Okay.
Andy: Well, yeah, I’ll start off with a hack here. So one of the hacks I like to talk about, I know I’ve mentioned this a number of times in other podcast episodes, but I really do believe it’s a hack. It’s something that people really don’t necessarily think about. Lowering the basement humidity. If you have a lower level of your home lowering the humidity to reduce IAQ issues all throughout the house, we know that indoor air quality is affected by moisture and not only because of mold formation, but also because a higher humidity also carries with it more off gassing from the surfaces that it comes from. And, folks, the more I do this and I’ve been at this for almost 30 years and so as Jay, I’m finding everyday new examples of why we really need to reduce humidity and re reduce moisture in our homes, just for such a variety of reasons, getting into how well our purification systems work. How good of sleep we get at night, so on and so forth. So I’d like to say it’s a healthy home hack to reduce the humidity specifically in your lower level. If you have one, if you don’t have a lower level than reducing humidity in the main level of your home; for those of us who live in climates, where we have basements, humidity in the home, a lot of times starts in the basement and rises up to the main level. So we want to keep the humidity below 50% is a target. I like to keep mine between 40 and 45%. Okay. Really cuts down on a lot of indoor air quality issues down the road.
Jay: Yeah. I was going to ask about that. What’s the optimum level there? From the coating standpoint, we talk about humidity all the time and in a little bit different way, we talk about it in terms of the effect that has on the drying and curing of coatings and with water-based coatings, logically, if there’s a lot of moisture in the air, then that has to be factored into when you’re doing a project and wondering what the timeline is for the products to actually thrive, right? And so if there’s an elevated humidity, then we know that we’re going to have to stretch out our timeline. It really is a factor when you’re in a situation where you’re doing multiple coats of anything. And you want to make sure that if there’s a high humidity that you want to give yourself more time between coats, what can happen is if you’ve got a high, high moisture in the air and you put on a coat of paint or a sealer, and then you come back too soon, within an hour or two, and you put another coat over that first coat in essence, you could be locking in some of that evaporative moisture that wants to get out of that first coat. And then the second coat kind of caps the first coat, coatings dry from the top down. And as that first, that second coast starts to dry down, it kind of puts a cap on the first coat and that moisture that was making an effort to get out is now retarded. And so that means that that moisture migration is going to take longer as it comes through the coats. People can understand this, they kind of get it, but in terms of reconciling it, so they answer, well, how long is that going to take? And that’s hard to say, so as you suggest in a basement, what we do is we try to reduce our humidity, bring the dry the air down and that’ll help to kind of move things forward as they should go.
Andy: Yeah. Everything you just said, so the hack of reducing humidity goes well beyond just indoor air quality. When it goes into how we do our projects around the home, that also brings me to a point about this and I’ll let you take the next turn with your hack. I just had a client come in and, and they’re looking to refinish doors and cabinets in their home. And he asked if I had any additional tips. And I said, I do specifically regarding air flow and air movement and keep in mind right now it’s about 90 degrees and about 70% relative humidity outside, I said, do yourself a favor and do not open the windows to get fresh air in the house, turn on the air conditioning, put fans on, but do not open the windows because your project will go south very fast. And he looked at me like, wow, thank you so much for telling me this because I would have thought just open up the windows and like let the air flow in. And that’s really, really counterproductive.
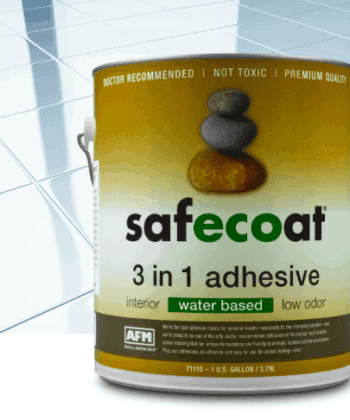
Jay: Yeah. It’s really determinative on what’s going on externally for sure. I can hear in here when I’m in a desert environment, I’ve got dry air. So for me to open my windows can be a benefit, but in a place like the East coast right now where the humidity can be over 90%, it’s almost raining and the sun’s out, it’s a wacky thing, but that kind of humidity can be a problem if you’re throwing your windows right open and letting all that moisture air come in. All right. So, here’s my hack, it’s the hack that has to do with knots in wood. It’s a problem with knotty type woods. Pines, probably the biggest offender when you’ve got these big old knots and the knots are dark in color compared to the other wood. And those knots are just saturated with turpines and lignans. And when water hits ’em the acidic nature of those components wanna come through coatings that are water based. So you put a coating on there and you, and it may look good for 24 hours, but then maybe longer, but then that not starts to bleed through it takes over a little time. So it’s, that’s a problem. And there are products out there that are usually it’s an oil, an oil based or shellac based containment. It’s a lot of people don’t want to do that because they’re worried about the VOC exposure. So I happened to be talking to an old guy, an old contractor, and he says, I, you know, I have an old trick. I is go really I’m interested. What is it? He says, well, you know what works really well on knots is glue. I said, glue? He goes, yeah. Glue, like what? Like Elmers glue? He goes, any white glue. I said, well, Hmm, let me think about that. As you alluded to in our last hack, you know, going backwards a little bit, you talked about doing a hack using the Safecoat 3 in 1 Adhesive as a replacement for a wallpaper adhesive. Remember that?
Andy: Wow. That is something, yeah.
Jay: You did, remember that? You said you could use 3 in 1 Adhesive, reduce it with water and then replace, replace your glue for wallpaper. Exactly, exactly.
Andy: Right. I mean, I’m just thinking about this as you’re talking about this, my mind is wandering to doing woodwork and I’m thinking, that makes a lot of sense, using that to seal the knot. That’s a great idea, Jay.
Jay: Well, yeah. And I experimented with it. I didn’t take Elmers glue because of course, Safecoat makes a 3 in 1 Adhesive we just talked about and I reduced it with water so I could brush it on. And it works. So if you have, some people say, well, man, the whole wall is knots. So I’ve got like 500 knots. I’m going to go around and dip every knot? Well, yeah, you could, it’ll be a little tedious, but wouldn’t that be better than like painting the whole wall and then finding out two days later that you got 500 knots that are still there? So, it’s a pretty interesting hack and, as all hacks you, and I know that if, if we don’t track test the hack, we can’t talk about the hack. And I tested this hack and it definitely works. So, 3 in 1 Adhesive reduced, I probably did it about 60/40, 60% glue, 40% water. Okay. And I brushed it on and whoa. It was a good deal. So, what’s your hack?
Andy: Well, let me just follow up on that one. Just to let everybody know, we do sell little two ounce sample containers of the 3 in 1 Adhesive. If you’re doing a small woodworking project, no needed to go to quart or a gallon of it. A little two ounce sample bottle. I would make a nice and simple take out the adhesive, pour in some water, shake it around, pour it out into the same container. You mix it together. And you’ve got enough to seal knots on probably about 500 square feet of wood. I am going to a different direction. I’m thinking of when we’re doing plumbing projects around the house, be it new construction or remodeling. Sometimes you can’t avoid the use of PVC, specifically in the drains. We don’t recommend PVC for water lines. We recommend either a PEX or copper. That’s a topic for a whole different podcast. But when it comes to the drains that are PVC, you cannot get around the use of PVC pipe adhesive, PVC pipe adhesive is what’s called a cyanoacrylate adhesive. What it actually does is it the solvent in the adhesive melts the plastic and that’s why you apply it to a pipe. You apply to both pieces and then stick it together. And you’re literally melting the plastic on the surface of both pieces. You stick it together, you hold it for about 60 seconds and it’ll never come apart. However, there’s a lot of solvent leftover the never reacts that sits on the surface and that can cause problems for days, weeks, months, even years sometimes. So my hack there is to take either a Denny foil product or even a simple aluminum foil and cut small pieces and wrap the pipe joints. You know what? You don’t need the wrap, the entire stretch of PVC pipe, but wrap the joints because that’s where the big problem will be from a chemical offgassing standpoint. This has saved a lot of folks over the years and you know, how do you apply it? Well, either just crinkle it on there, with your hands or use a metal tape to secure it to the pipe. It’s not going to affect the performance of the pipe whatsoever. It won’t degrade anything, but it will seal in that off gassing from the pipe adhesive.
Jay: That is such a simple hack. I want to ask you, you mentioned the product, Dennyfoil. Why don’t you, why don’t you tell our listeners with Dennyfoil is?
Andy: Sure. So Dennyfoil is a reinforced foil barrier. What’s called a radiant barrier. Uh, the one that we stock it’s got foil on two sides in the middle is a reinforced construction paper. It has been used for decades as a vapor barrier in construction. It’s used as a radiant insulate of barrier. In many climates when you’re building things like metal buildings, you don’t have the thickness in the wall to do full insulation, but radiant insulation specifically in buildings where you’re not heating and cooling, these are commercial buildings, a radiant insulation essentially bounces back the radiant energy from what’s behind it. So that way your metal buildings don’t heat up as much in the summertime.
Jay: Got it. Got it.
Andy: And so we use it as a catch all with our chemical sensitive clients, because if a certain coating won’t work because of sensitivities or the application is just not conducive to put in a water based coating, when all else fails, Jay, we use Dennyfoil. 3 foot wide sheet of material comes in 500 square foot rolls. It’s about 60 bucks a roll, and you can get a lot of work done with it. With one roll. We even have clients now using it to help cut down on electromagnetic fields caused either by wiring, by magnetic fields or even RF, microwave cell towers. And it does a fantastic job of what, for what it is.
Jay: Has shielding properties. Yeah. I’m familiar with it too, because of the work with the chemically sensitive, as you said, it’s sometimes it’s the stop gap is other situations, others approaches that aren’t really working. Okay, another old idea and this is again coming from the contractor world, and I think there’s some good things about it. So, this technique I’m going to talk about is dealing with painting and in particular, talking about painting with more saturated or darker colors. So when you’re working with dark colors, depending on the color, there’s- in the paint world, folks, you have, you have bases. So if you go to your paint store and you’re looking at different colors, there’ll be a base for that color. And in the case of our brand Safecoat, we have four, we have a pastel, which is a very lightest, and then we go through tint, deep, an accent, and the accent and deep colors are loaded with pigment. If you were to open a can of an accent base can of paint just with no color in it, you’d see almost two inches of air space in the top of the can, which is there to allow all the pigment that needs to go into the can to make that particular color. Well, as counterintuitive as it may sound, when you were applying heavy pigmented paint or accent colored paint, they can be actually a lot more transparent than you might imagine. And what that then requires you to do is to apply more coats to get the depth of color they’re looking for. And what’s called hide. Hide is how well a coating hides the background that’s going on. It’s not coverage. I think people misuse the terms they think hide is coverage, and it’s not exactly true. Coverage is really how far gallon of paint is supposed to cover in square footage at a certain mill thickness. Hide is how well that coating hides the background it’s going over. So if you’re putting on a real saturated color and you’re brushing it on that first coat, and you see that first coats on there, and it almost looks like you’re looking through it, you see color, but it’s not as deep and as rich as you want. So there’s a technique called split coating. And I’ll explain it in a couple of ways. The traditional idea of a split coat was that the contractor would take the primer that they were going to use in the beginning and they’d mix the color of paint. So they do half and half, they pour half the primer into a bucket and the other half to make a gallon would be the pain. And so in essence, what you were doing is taking your color and tinting the primer. And what this was doing is it was setting up a background that wasn’t going to be the background that would be pure white primer. And so it was that it was a way to kind of get around having to do multiple many, many coats of the darker saturated colors, the other way to do this. And I know Andy, and we did it. The other way that this can be done is you can actually add colorant to the primer. There’s some kind of basic understanding about how you add color. And then you go paint over that primer that’s got some color in it already. You’re going to get better hide with less coats. That’s the theory behind it. So that’s either tinting the primer what’s called split coating.
Andy: So I would recommend, I’m split coating is something that I would let a professional do. Just because of mixing paint and primer together. What I fear is the viscosity differences between the two. If you don’t blend it properly, you’ll get some ribbon effects.
Jay: Yeah. It’s really a pro thing, thank you for the input. Because it’s really a pro thing. And it’s really, I guess I would say it’s more kind of on the job site. They need to make some kind of a correction and their timing isn’t allowed for what I know you’re going to say as the backup to this. So it’s like something that’s you can do, but it’s not something that’s promoted widely as an approach. So go ahead and the backend of that is, go ahead. I know what you’re going to save at. Say it.
Andy: There’s a lot of things I could say, Jay, let’s put it this way. That’s always a buyer beware sort of thing. We do tint to primers here. We don’t do it often. When we do it, it’s usually because you’re going with as you said, a very saturated color and we don’t try to get close to the color chosen. We try to just tends to a warm tone, which uses just some raw umber, or we tend to a cool tone, which is black and it’s very effective. It does work. And it’s something that people should think about. You don’t tint primers because of what’s on the wall. You tint primers for what you’re putting on the wall.
Jay: Yeah. And the primer is not… we’re not trying to substitute for a good solid coat of paint here.
Andy: Correct.
Jay: What we’re trying to do is we’re trying to ease the burden of the loaded pigment and its ability to hide the back.
Andy: Exactly. Very good. Very good. I like that. Okay. So let me jump into my third hack. My third hack, I’m kind of going back to the first, we talked about basements. I seem to have a theme whenever I talk about water penetration, air penetration. I talk about basements and attics, but my hack is up in the attic, especially this time of year. Making sure that your attic is properly ventilated to the outside. This is something that all too often people forget about. Over the last 15, 20 years, many people were rushing to get their attics insulated, adding insulation up there to give them better energy efficiency. So it doesn’t cost so much to cool or heat the home throughout the years. The problem with that is if you have a home that has soffits that hang off from away from the house, sometimes these insulations were put over the soffits and plugged up the soffits vents. And you need the vents there because essentially you want the attic to be the same temperature as the outside of the house. So when you cover up the attic vents, now there’s no air movement in your attic. Your attic starts to heat up. And when your act starts to heat up, eventually that transfers down into the house and your cooling costs will skyrocket. And it’s the opposite in the winter time. So, the healthy home hack is to make sure that if you’ve got soffit vents, make sure they’re unplugged. If you don’t have soffit vents, you might want to think about it. You need roof vents, whether it’s a ridge vent or individual events or Gable vents, just do what you can to make sure that the attic is the same temperature as the outside of the house. And that will, decrease your energy costs, improve your indoor air quality.
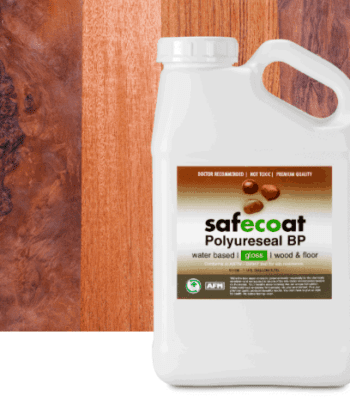
Jay: And it’s not that of an invasive thing to have to do. So it’s a real simple hack. It’s a fairly inexpensive hack and it reaps incredible benefit. I like that hack Andy. Here’s my last hack. And I’ve been kind of in the coatings hack world here. Haven’t I? So this one is when you’re dealing with, you’re wanting to stain wood and the wood is soft and has uneven porosity, and this is a species of wood, pine for other example, and I alluded to it with the knots. Again, pine is another good example here, a very light colored wood, a very soft wood. And when you’re staining in this kind of wood, especially with water-based stains, uh, you’ll get uneven penetration. And that means that your color is going to look blotchy over a wood that’s that got that softness. So the idea here and it’s well known in the industry is what you do is you make what’s called the sanding sealer. Now, the other thing that happens when you’re applying water based products to what is the grain of the wood will what’s called pops, the grain pops up and little whiskers develop. And so, because of that, you want to control as much of that as you can. And so one of the hacks that I think is really effective here, when you’re getting right before you’re sanding, you can buy a sanding sealer in the marketplace, or, and this is where the hack comes in. If you’re using a dedicated clear finish to go over your stain, as your finished coating, you can actually take your finished coating and all my example from our brand is Safecoat Polyureseal BP as your clear coat. And you would take that Poly BP, and you would dilute it with water. I use about a 50/50 blend. And then what you do is you apply that across that wood floor before you stain it. Now what’s going to happen is the Polyureseal that little amount of Polyureseal, so it’s soaked in is going to start to even out the porosity of the wood, which means when you’re staying hits it your stain is not going to find the real porous areas and soak in and get real dark, and in the harder areas be lighter, it’s going to kind of even out that stain saturation, so that the colors more even. The one caveat about this is when you’re sealing the wood a little bit, your color is not going to be as rich as it would be if you had no sealer there to protect it, but in terms of the overall look, I think it will be better because it’ll be more even, if it’s necessary, you may have to do a second stain. If you’re really going for a darker kind of stain look, you might have to do a second coat of stain, but the overall effect is we don’t have blotchiness, which is we’re trying to avoid with this hack. We want to eliminate blotchiness. The other thing too, when you’re doing the grain raising and what’s called de-whiskering that first coat of the sanding sealer or the penetration control sealer, you can lightly sand that and kind of get those whiskers off of there. And that’s a benefit as well, but mostly it’s really to control the the color penetration in the staining process.
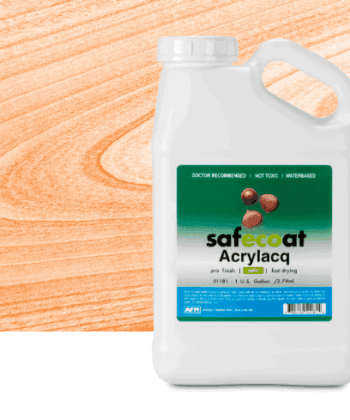
Andy: Love it. I’d say that’s a great hack. And that’s one I’ve used myself many times. Very, very effective. It works with both the Polyureseal for floors. It works with the Acrylacq. You may use a little less water because that’s already a little lower solids content, but it is effective. I love the idea of applying it, letting those whiskers rise up. And when those whiskers rise up, then it makes the sanding process or the screen process to knock those down easier. Because now those whiskers are nice and hard. They shave right off.
Jay: They go right off. I like the de-whiskering term too, because it has a real visual, doesn’t it?
Andy: It does. It does. Excellent, excellent list of hacks today. I think that as we get more, and you and I both probably have hundreds that are stuck in our minds from over the years, and we’ll do another show on this. We promise, maybe another six months, but we’ll do another show about healthy home hacks. Folks, let me give you one more hack to end the show on and let you go into the holiday weekend. Here’s a hack for you. Turn off the news, turn off the TV, get a book, maybe your favorite podcast and get outside and enjoy outside. Enjoy the fresh air, enjoy the relaxation not having to listen to the news of the day. It’s good for the mind, body and soul. So, Jay, thank you very much for another great episode.
Jay: That was a great ending hack, Andy. And I would just add that folks. If you have a hack of your own that you think is worthy of hack show 3, we would love to have it. And Andy is going to give you the lowdown on how to get to us.
Andy: You got it. So you can reach us andy@degreeofgreen.com. You can go to the Degree of Green website, leave us a SpeakPipe which is a message, a voicemail message, right on the show. And as always, we would love it if you go to iTunes and leave us a rating and a review folks, we are still the highest rated, healthy home show in the entire Apple podcast realm. It is amazing. And there are many shows out there. It’s not as if we’re the highest rated of two. There are a lot of shows out there that deal with green building. We are the highest rated and we owe it all to you the listeners for tuning in every week, and we greatly appreciate it. We’ll be back next week with another episode of Non Toxic Environments. Take care, everybody.
View Transcript PDF
In this episode…